 Fast shipping at your doorstep
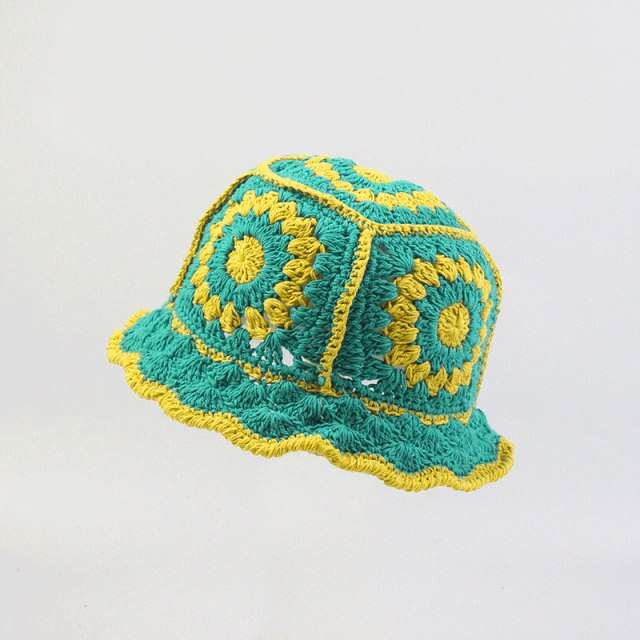
Crochet has been around for centuries, but it’s only in the last few years that it’s become a popular craft. And why not? Crochet is easy to learn and fun to do, which is why so many people are turning to it for their projects. One of the most popular crochet projects is the mushroom bucket hat.
This hat is super easy to make and requires just a few basic crochet stitches. If you want to learn how to crochet a mushroom bucket hat cheap, you can follow these simple steps.
What Do You Need To Make A Mushroom Bucket Hat?
In this blog post, we are going to learn how to crochet a mushroom bucket hat. This is a quick and easy project that is perfect for the fall season. You will need basic crochet skills and materials to make this hat.
First, you will need to make a ring out of the chain stitch. Make sure that the chain stitch is tight so that the hat stays together while you are crocheting it.
Next, start crocheting in the round using single Crochet stitches. Work your way up to the top of the ring, making sure to leave enough space so that you can fit your head inside of it later on. When you reach the top of the ring, decrease by crocheting two single Crochet stitches together. This will create a hole in the center of the hat.
Now start crocheting inwards from the hole until you reach the bottom of the ring. Once you have reached the bottom of the ring, increase by crocheting two single Crochet stitches together. Do this three more times until you have reached your desired height for your mushroom bucket hat crochet. You can now finish off your hat by weaving in any remaining ends and attaching it to your head with an elastic band or hair tie!
Crochet a beautiful, cozy mushroom bucket hat! This easy-to-follow pattern features a fun and stylish beanie style with a peaked top and wide brim. You will need just a few basic stitches to create this classic accessory. Make one for yourself or give it as a gift!
Time: Approximately 2 hours
Yarn: Worsted weight yarn in the colors of your choice (I used Worsted Weight Yarn in Brown and White)
Hook: Size H/8mm crochet hook (5.00mm) or size needed to obtain gauge
Gauge: 12 sc = 4″ in St st; 10 rows = 4″ in St st
Tips For Crocheting A Mushroom Bucket Hat
Crocheting a mushroom bucket hat is a simple and easy process that can be completed in just a few hours. This hat is perfect for the fall season and can be made in any color or style you desire.
To begin, chain 36 (or any desired length). Slip stitch into the first chain to form a ring.
Round 1: Ch 3 (counts as dc here and throughout), 2 dc into the ring, ch 1, *3 dc into the next ch1 space, ch 1; rep from * around.
Round 2: Slipping st into each of the first 3 dc, make 2 ch SPS (see photo), *ch 3, SK next 3 dc, sl st into next sp; rep from * around. Join with a slip stitch to the top of ch-3. Leave a long tail at the end for stitching when you fasten off.
For the brim of your hat, start by crocheting 6 sc evenly spaced along the edge of the brim. Make sure to join each sc at the end of the round with an sl st so it forms a smooth surface. Leave a tail for stitching of 8 inches after fastening.
Next, sew 9 sc evenly spaced along the edge of the brim using the long tail you left earlier. Be sure to leave enough room at the top of your hat so you can fit your head inside! Fasten off and weave in all ends securely
If you’re looking for a unique crochet project, try making a mushroom bucket hat and black bucket hat womens! This pattern is easy to follow and can be completed in just a few hours. You’ll need basic crochet stitches and supplies like a J hook and Worsted weight yarn. The finished hat measures about 18 inches wide by 12 inches tall. Enjoy!
To Begin, Chain 30 (36 For Larger Hats):
Round 1: SC in 2nd ch from hook and each ch across. (28 SC)
Round 2: Ch 2 (counts as first dc here and throughout), *dc in next st, sc in next st; rep from * around. (30 dc)
Round 3: Ch 2, turn, *sc in next dc, skip next 2 dc; rep from * around. (24 sc)
Rounds 4-7: Rep Round 3. (20 sc)
Round 8: Ch 2, turn, *dc in next sc, SK next 2 sts; rep from * around. (12 dc)
Rounds 9-11: Rep Round 8. (8 dc)
Fasten off the yarn and weave in the ends.
How To Crochet The Brim Of The Hat?
To crochet, a brim for your mushroom bucket hat, start by chaining 4 and making a ring.
Row 1: 2 sc in the ring, sc in each remaining ring.
(8) Row 2: Ch 1, turn, SK first sc, hdc in next sc, dc in next sc.
(6) Row 3: Ch 1, turn, SK first hdc, dc in next 2 hdc.
(4) Row 4: Ch 1, turn, SK first dc, hdc in next dc. Do not sl st in the last stitch. (2) Fasten off and weave in ends.
Now it’s time to sew the brim on! First, take your two corners and put them together so they form an “X.” Make sure the stitches are facing outwards so that you can see them when you’re sewing them on later.
Sew them together using a slip stitch or bobbin thread as needed. Don’t overstuff or pull too tightly – just make sure they hold their shape while wearing the hat!
How To Crochet The Body Of The Hat?
If you’re new to crocheting or haven’t crocheted in a while, it can be helpful to follow a few basic steps when starting out. This includes learning the basic stitches, like chain and single crochet, as well as how to work in rounds. The next step is learning how to make a basic hat shape.
This is where the fun begins – you can create any style of hat with just a few simple steps!
Here’s How To Crochet A Mushroom Bucket Hat:
To begin this project, chain 30 (36 if using heavier yarn). To make the base of the hat, single crochet in the corner space closest to you (counts as first dc), *skip 2 chains, dc in next chain*, Rep from *to* across. Finish off with an Sl st in first st.
Next, working on the opposite side of the first dc, begin working double crochet (dc2tog). *Skip 2 stitches, dc2tog in next stitch*, Rep from *to* until there are only 6 (8) stitches left on each side of the base. Finish off with an sl st in first st.
Now it’s time to add the brim of your mushroom bucket hat and extra large bucket hat! Chain 5 (7), then sc evenly around the edge of the brim. Join with an sl st in the top sc of initial ch-5 (ch-7). Break yarn and draw through the last sc and all loops on the hook. Weave in ends.
How To Crochet The Mushroom Attachment?
This post will show you how to crochet a mushroom bucket hat. The finished product will be a fun and quirky hat that is sure to make a statement. The pattern is easy to follow, and the hat takes only a few hours to complete.
You Will Need:
- Crochet hook size H (5.0 mm)
- Yarn in green, black, and brown colors
- Scissors
- Stitch marker
- Tapestry needle
- Fiberfill stuffing material (optional)
1. Start By Making A Magic Circle Using Green Yarn.
Add black yarn into the next stitch, and then pull through both loops on the hook. This makes a star shape. You can keep crocheting in this way around the magic circle until your hat like a furry bucket hat is the desired size or you run out of yarn.
2. We are going to start working on the round now. Join green and black together in the middle of the star shape, and then ch 2 (counts as first DC). Work 1 DC into each stitch around.
You’ll end up with 12dc total. Sl st into the top of the first dc of the previous round for joining off, then cut yarn leaving a long tail for sewing later on.
3. Take your brown yarn and join it with sl st into
How To Finish The Hat?
Here is a blog on how to crochet a mushroom bucket hat. This pattern is designed for beginners and can be completed in about an hour.
To begin, chain 36 (or whatever size you desire your hat to be). Then join with an Sl st to the first chain, being careful not to twist the chain.
Rnd 1: Ch 3 (counts as dc here and throughout), 2 dc into the top of the chain from before, *ch 1, SK 1 dc, rep from * around.
Rnd 2: Sk 1 ch, dc into next ch-1 space, SK 1 dc, work 2dc into next ch-1 space, SK 1 dc, rep from * around.
Rnd 3: Ch 3 (counts as dc again), 2dc into next ch-1 space, *ch 1, SK dc2tog* twice (this will create a double stitch between the two dc’s), work 2dc into next ch-1 space, SK 1 dc.
Work this way until you reach the end of the Rnd 3 or until you have enough yarn left to continue crocheting without having to weave in any ends. End off with a slip stitch in the last stitch.
Conclusion:
Crochet a mushroom bucket hat that is not too hard, and it will keep you warm during the colder days. The hardest part about this crochet project is making sure that you measure your head correctly before beginning to crochet.
Once you have crocheted the hat, it is time to add the fun details like the eyes, mouth, and horns. Enjoy your new crochet mushroom bucket hat!


